How to Do Bubble Braids: Easy Step-by-Step Tutorial
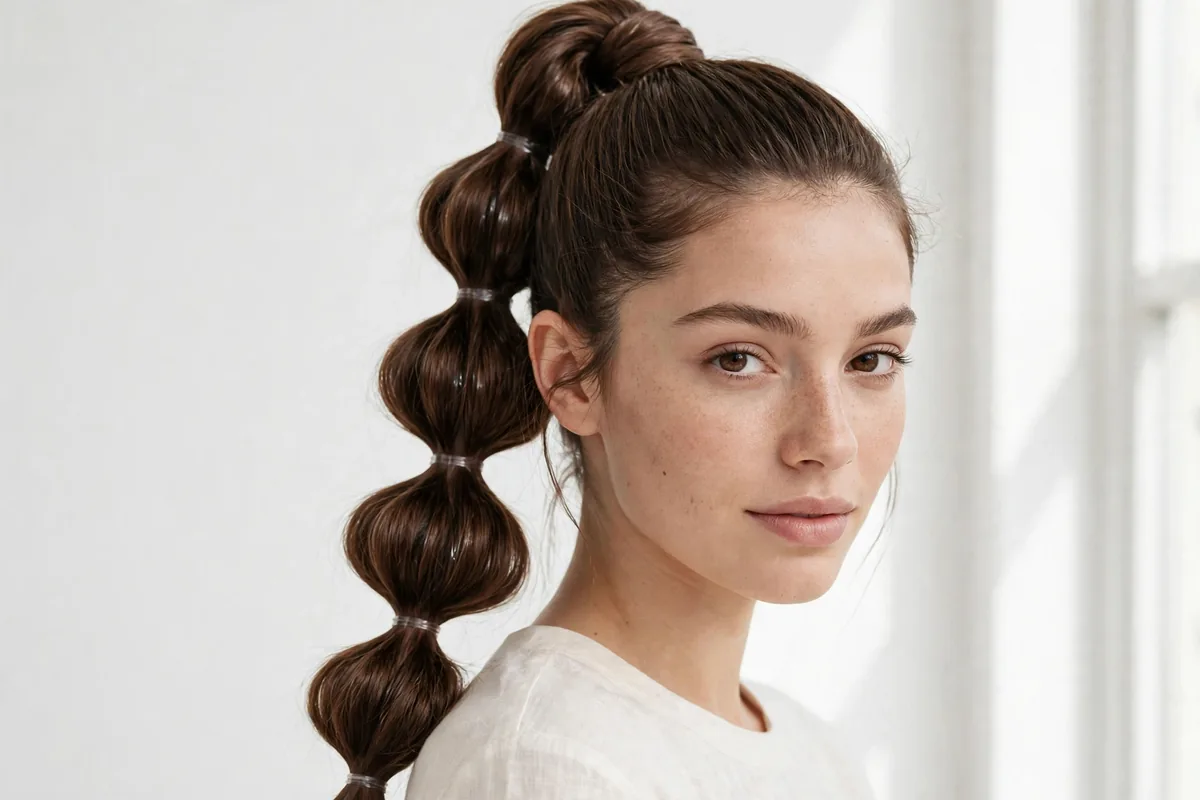
Bubble braids look complicated but they are one of the easiest hairstyles you can do at home. No braiding skills required. The secret is simple: a ponytail, a few small elastics, and a gentle pull. That is all it takes to get those rounded, puffy sections that are all over social media right now. To do bubble braids, secure your hair into a ponytail, add small elastics at regular intervals down the length, then gently pull each section outward to create the bubble shape. This guide covers everything from the basic single bubble braid to double, half-up, and short hair versions.
What Are Bubble Braids?
Bubble braids are a ponytail-based hairstyle made by separating the hair into rounded sections with elastic bands. Each section is gently loosened to create a puffy, bubble-like shape. Unlike French or Dutch braids, bubble braids do not involve weaving strands together. The elastic bands create the separated sections, while pulling the hair outward gives each bubble its volume.
The hairstyle works on straight, wavy, curly, and coily hair. You can also adjust the size of the bubbles, the position of the ponytail, and the type of hair ties to create different looks.
What You Need to Make Bubble Braids
Gather everything before styling so you can work without stopping.
- Hairbrush or wide-tooth comb: To remove tangles and smooth your hair.
- Rat-tail comb: To create a clean middle or side part.
- Small elastic bands: Clear, black, or colourful elastics can all work.
- Regular hair tie: To secure the main ponytail.
- Hair clips: Useful for keeping sections separate when making double bubble braids.
- Styling gel or cream: Optional for smoothing flyaways and controlling frizz.
- Hairspray: Optional for a light finishing hold.
Choose snag-free elastics designed for hair rather than ordinary rubber bands. They are generally easier to remove and less likely to catch strands.
How to Do Bubble Braids Step by Step
Time: Approximately 10 to 15 minutes. Difficulty: Beginner-friendly. Best for: Medium to long hair, although shorter versions are possible.
Step 1: Brush and Prepare Your Hair
Start by brushing your hair thoroughly to remove knots and tangles. Smooth, detangled hair makes it easier to position the elastics evenly and create neat bubbles.
Bubble braids can work on freshly washed or second-day hair. If your hair is very silky or slippery, a small amount of texturizing spray may help the elastics stay in place. If you have curly or coily hair, gently detangle using a suitable conditioner or leave-in product before styling. You do not need to straighten your natural texture to create bubble braids.
Step 2: Choose Your Ponytail Position
Decide where you want your bubble braid to sit.
- High ponytail: Creates a playful, lifted look.
- Mid ponytail: Gives a balanced everyday hairstyle.
- Low ponytail: Looks softer and more understated.
- Side ponytail: Adds a relaxed, casual touch.
Brush your hair into your chosen position and secure it with a regular hair tie. Make sure the ponytail feels secure but does not pull painfully on your scalp.
Step 3: Add the First Elastic Band
Take a small elastic band and wrap it around your ponytail a short distance below the main hair tie. For most medium-to-long ponytails, starting around 2 to 3 inches below the base is a useful guide. Adjust the distance depending on your hair length and the size of the bubbles you want. The section between the two elastics will become your first bubble.
Step 4: Create the First Bubble
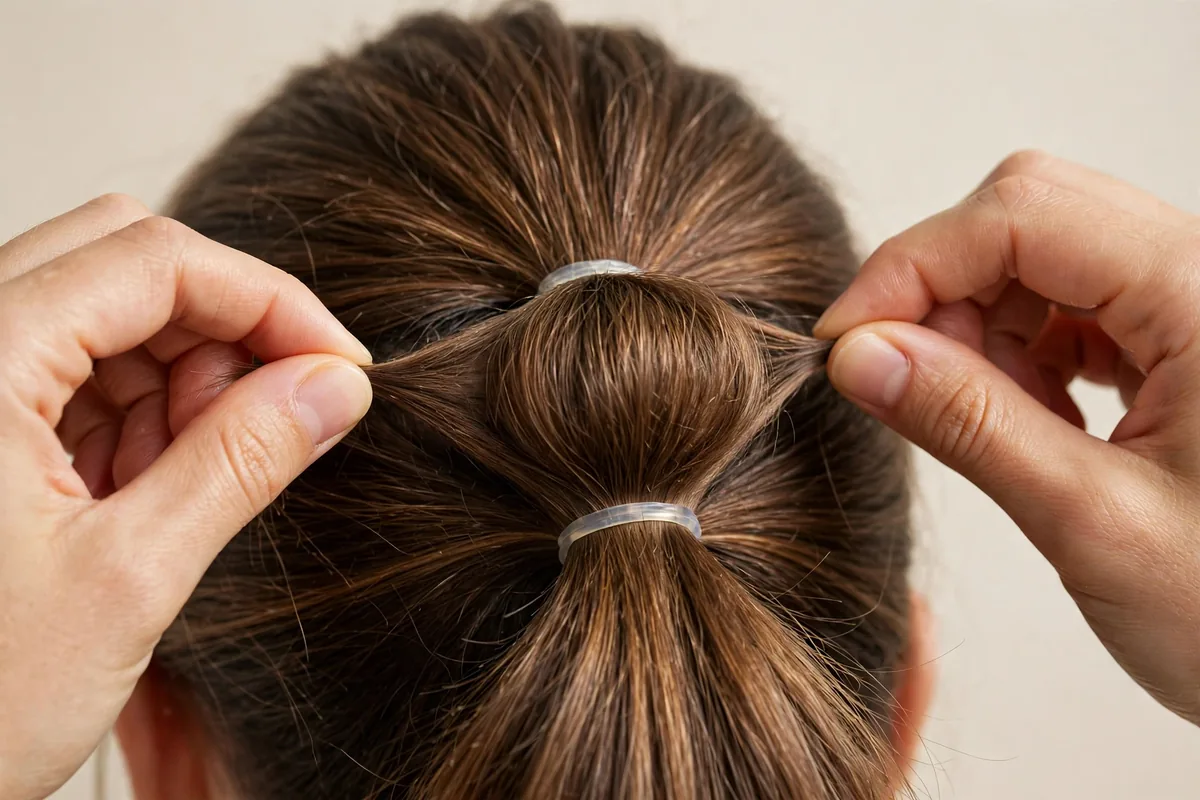
Hold the lower elastic steady with one hand. Use your fingers to gently pull the hair between the two elastics outward from the sides. Work around the section rather than pulling only from the front. This helps create a rounded shape that looks fuller from different angles.
Pull gradually and check the shape as you go. You want the hair to look softly puffed, not stretched thin or tangled.
Step 5: Continue Adding Elastic Bands
Move another short distance down the ponytail and add the next elastic band. Repeat the same process:
- Secure the ponytail section with an elastic.
- Hold the elastic steady.
- Gently pull the hair above it outward.
- Adjust the shape until the bubble looks rounded.
- Move down and repeat.
Continue until you reach the ends of your hair. Keep the spacing visually consistent, but make the final sections slightly shorter if your ponytail becomes thinner toward the ends. This helps prevent the lower bubbles from looking too narrow.
Step 6: Adjust the Shape and Finish
Look at your bubble braid from the front, sides, and back. If one section looks smaller than the others, gently loosen it to balance the shape. You can make every bubble the same size for a neat appearance or create larger bubbles near the top and smaller ones toward the ends.
Smooth any flyaways with a little styling cream or flexible-hold hairspray. Avoid using too much product, as heavy formulas can weigh down the bubbles.
Your basic bubble braid is ready.
How to Do Double Bubble Braids
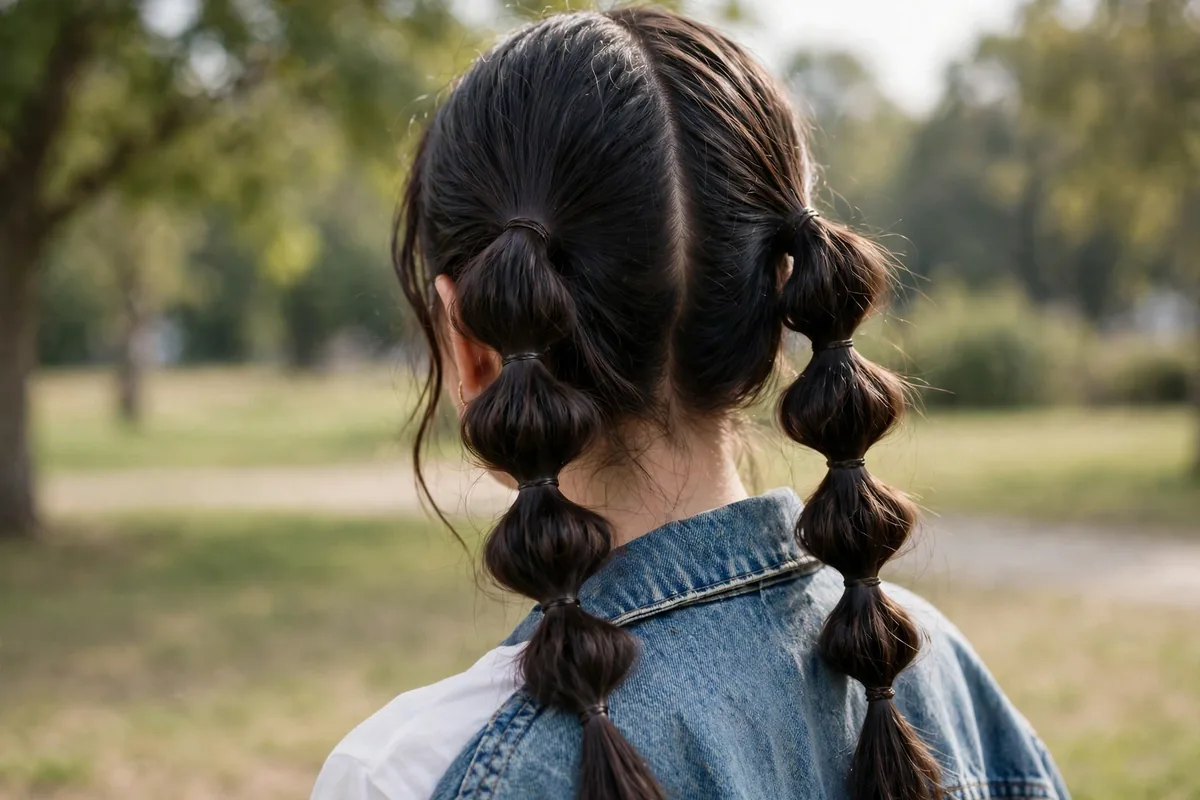
Double bubble braids create two matching ponytails, one on each side of your head. They are a fun option for casual outfits, festivals, parties, and everyday styling.
Step 1: Create a Middle Part
Use a rat-tail comb to divide your hair into two equal sections from the front of your head to the back. Check the part in a mirror to make sure both sides are balanced.
Step 2: Secure Two Ponytails
Brush each section into a ponytail and secure it with a regular hair tie. You can position them high, around the middle of your head, or closer to your neck. Try to keep both ponytails at the same height.
Step 3: Add the Mini Elastics
Take one ponytail and add small elastic bands down its length, leaving a little space between each one. Repeat the process on the other side. Use approximately the same spacing so the two bubble braids look balanced.
Step 4: Puff Out Each Section
Gently pull the hair between each pair of elastics outward to form the bubbles. Work on one side first, then copy the shape on the other side. Compare them as you go rather than waiting until the end to make adjustments.
Step 5: Complete the Look
Adjust any uneven sections and smooth the hair around the ponytail bases. You can finish with colourful elastics, ribbons, or small hair accessories.
How to Do Half-Up Bubble Braids
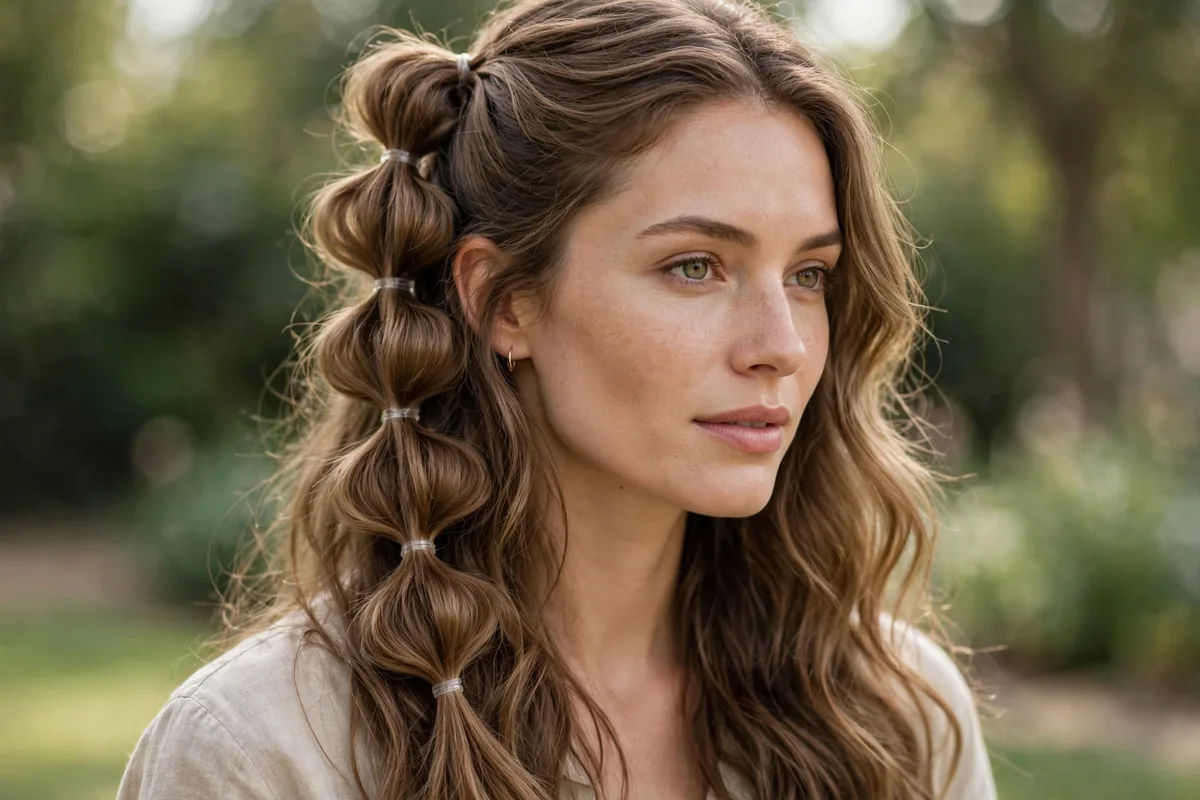
Half-up bubble braids are a good choice if you want to keep some hair away from your face while leaving the rest loose. Brush your hair and create a middle or side part. Take a section of hair from each side near the temples. Bring both sections toward the back of your head. Secure them together with a small elastic. Add another elastic a short distance below the first. Gently pull the hair between the elastics outward to create a bubble. Repeat if you have enough length for additional sections.
Leave the remaining hair loose or add soft waves. You can also create a single half-up bubble ponytail by gathering the top section of your hair and following the same steps.
How to Do Bubble Braids on Short Hair
You do not need very long hair to try this hairstyle, but the technique needs a few adjustments depending on your length. If your hair sits around shoulder length, a half-up bubble braid or two smaller bubble ponytails will work better than a full-length ponytail style. Both require less length and still give you the same rounded bubble effect.
For shorter layers, use smaller elastic bands and keep the spacing between each one tighter. Create fewer bubbles overall and avoid pulling the sections too far outward, as short hair has less slack to work with. Secure any loose pieces with discreet bobby pins rather than forcing them into the elastic.
Another option that suits shorter hair well is a French-style bubble braid. Instead of starting with one complete ponytail, you gradually gather small sections of hair and secure them with elastics as you move down the head. This creates a connected, segmented effect that sits closer to the scalp and works with less overall length.
Tips for Making Bubble Braids Look Fuller
If your bubbles look flat or uneven, a few simple adjustments can improve the result.
- Start with completely detangled hair. Knots can make the sections look uneven and difficult to shape.
- Use a little texture. If your hair is naturally slippery, a light texturizing spray can give it more grip.
- Pull from all sides. Gently loosen the entire section instead of pulling only at the front.
- Adjust bubble sizes. Make the upper bubbles slightly larger and reduce the size as the ponytail gets thinner.
- Choose suitable elastics. Small, snag-free bands help hold each section without bulky knots.
- Check the back. Use a second mirror or take a quick photo to see whether the bubbles look balanced from behind.
Common Bubble Braid Mistakes to Avoid
Even though bubble braids are simple, a few mistakes can make the finished hairstyle look messy or uncomfortable.
Pulling the Bubbles Too Hard
Over-pulling can make the sections look stretched and uneven. It can also loosen the elastics. Use small adjustments until each bubble has a rounded shape.
Leaving Too Much Space Between Elastics
Very large gaps can create oversized bubbles that are difficult to balance, particularly on thinner hair. Start with shorter gaps and adjust them to suit your ponytail length.
Making the Ponytail Too Tight
A tight base can cause discomfort and unnecessary tension around the hairline. Secure the ponytail firmly enough to hold but not so tightly that your scalp hurts.
Using Ordinary Rubber Bands
Rubber bands can catch and pull hair during removal. Choose small elastics made for hairstyles instead.
Removing the Elastics Too Quickly
Pulling elastics out roughly can cause tangles and breakage. Carefully unwind them or use a purpose-made elastic-removal tool. If an elastic is difficult to remove, do not yank it or cut close to your hair.
How to Make Bubble Braids Last Longer
Bubble braids can stay in place for several hours, although the results depend on your hair texture, the tightness of the elastics, and your daily activity. For a longer-lasting style, begin with dry, detangled hair and use a light styling product if your hair needs extra grip. Make sure each elastic is secure without pulling painfully, and avoid repeatedly touching or pulling the bubbles throughout the day. A light mist of flexible-hold hairspray can help maintain the shape without stiffening the hair.
Avoid sleeping in tight bubble braids. Friction and tension overnight can cause tangling or breakage. Remove the style gently when you are finished, and if you notice scalp soreness or pulling at any point, loosen or remove the ponytail rather than keeping it in place.
Final Thoughts
Bubble braids are an easy way to create a stylish hairstyle without learning complicated braiding techniques. All you need is a ponytail, a few small elastic bands, and a gentle pulling motion to create the rounded sections. Start with a simple ponytail if you are new to the style, then experiment with double bubble braids or half-up versions. Keep the elastics comfortable, adjust the bubbles gradually, and choose a style that works with your hair length and texture.